
What ASIO4ALL latency compensation controls
ASIO4ALL is a bridge between an ASIO host and Windows WDM audio endpoints. The host asks for an ASIO buffer, while the selected device and its Windows driver determine how that buffer is processed. Latency compensation tells the host that an input or output path has additional delay. It is a reporting and alignment control, not a replacement for a stable driver, a quiet USB connection, or a working monitoring route.
Separate three measurements before changing settings. The buffer describes how many samples the host processes at a time. The sample rate describes how quickly those samples are played. Round-trip latency also includes converter, device, driver, plugin, and monitoring delay. A small buffer can reduce the host portion while a Bluetooth link, a busy USB hub, or a native device setting still dominates the audible response.
| Control or symptom | What it means | First action |
|---|---|---|
| ASIO buffer size | Samples processed per block; lower usually means less host delay | Start at 512 or 256 and step down only after playback is clean |
| Latency Compensation In/Out | Delay reported to the host for a selected path | Keep the default unless a measured loopback tells you what to enter |
| Sample rate | Samples per second used by the project and endpoint | Match the host and device rate before judging latency |
| Crackles or dropouts | The device cannot complete a block reliably | Raise the buffer, close competing apps, and retest one endpoint |
Choose a stable buffer before chasing latency
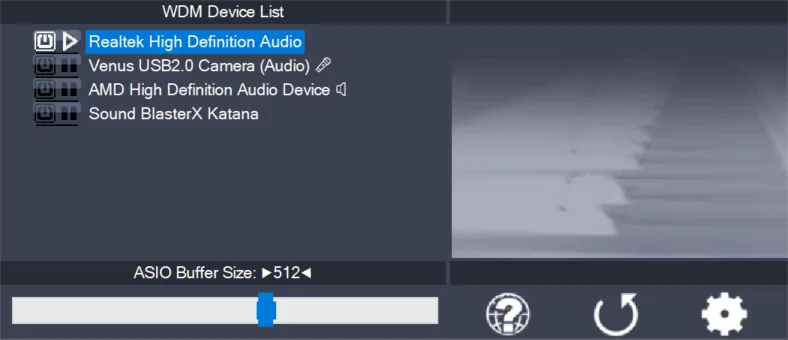
Use a short, repeatable test project with one instrument or audio file. Select the exact speakers, headphones, interface output, or microphone that you will use. A 512-sample starting point is intentionally conservative. If it plays cleanly, try 256, then 128, and only then a smaller value offered by the device. The correct result is the lowest setting that remains clean during the work you actually do, not the lowest value that survives an idle desktop.
ASIO4ALL's official buffer reference explains that a smaller buffer generally lowers latency but that crackles and distortion mean the buffer is too small for the current path. A browser, video call, virtual cable, or second DAW can take ownership of the same WDM endpoint and change the result. Close those programs during the baseline test so a device conflict is not mistaken for a buffer limit.
- Record the baseline
Write down the host, device, sample rate, buffer, monitoring mode, and active endpoints before making a change.
- Open the ASIO4ALL panel
Choose ASIO4ALL v2 in the DAW and open its control panel from the same audio settings screen.
- Enable one route
Power on one known output and the input you need. Leave HDMI, Bluetooth, unused microphones, and extra interfaces off for the first test.
- Test a moderate value
Play a simple project at 512 or 256 samples for several minutes. Listen for clicks and watch the host meter.
- Step down and stop
Try the next lower value only when the prior setting is clean. Return to the last stable value when a crackle, dropout, or device reset appears.
Match sample rate and estimate real delay
The rough one-way buffer duration is samples divided by samples per second. At 48 kHz, 256 samples is about 5.3 ms for one buffer; at 44.1 kHz it is about 5.8 ms. A host normally has an input and output side, and the hardware and driver add their own time, so the audible round trip is higher. Use the calculation to compare settings, not to promise a measured microphone-to-speaker result.
The official ASIO4ALL reference notes that overall latency is not linear across every buffer range. It describes 512 samples as a safe default and points to the under-10 ms and under-4 ms regions as useful reference points. Those are orientation markers, not a universal target. If the endpoint becomes unstable at a smaller value, a clean 256 or 512 sample path is more useful than a silent low-latency claim.
| Sample rate | Buffer | Approx. one-buffer duration | Use |
|---|---|---|---|
| 44.1 kHz | 512 samples | 11.6 ms | Safe starting point for a demanding project |
| 44.1 kHz | 256 samples | 5.8 ms | Practical monitoring test when the route is stable |
| 48 kHz | 256 samples | 5.3 ms | Common low-latency baseline for Windows projects |
| 48 kHz | 128 samples | 2.7 ms | Try only after a clean 256-sample test |
| Any rate | 64 samples | Device-dependent | A stress test, not a default recommendation |
Use latency compensation sliders carefully
Latency Compensation In and Out are easy to misread because they look like performance controls. They tell the host how much delay to account for on a selected input or output path. FL Studio's ASIO4ALL documentation recommends leaving them at their defaults unless you have measured the actual device path with a loopback cable. A larger or smaller number does not automatically make the audio arrive sooner; it changes the timing information reported to the host.
If you have a repeatable loopback measurement, change one compensation value, restart the host if it does not refresh the device, and compare the recorded offset with the measurement. Keep a note of the endpoint, rate, buffer, and host version. Do not copy a forum value from a different interface or use registry edits to force a smaller buffer as a first-line fix.
- Leave In and Out compensation at the default during ordinary playback and recording.
- Measure a real loopback path before entering a custom compensation value.
- Change one slider at a time and keep the same sample rate and buffer for comparison.
- Restart the host when the displayed value does not follow the slider or the application caches the driver setting.
- Treat registry edits and undocumented buffer limits as advanced experiments with a rollback plan, not as a normal setup step.
See Image-Line's ASIO4ALL audio settings manual for the host-specific explanation of buffer conversion and compensation.
Fix crackles, clicks, silence, and drift
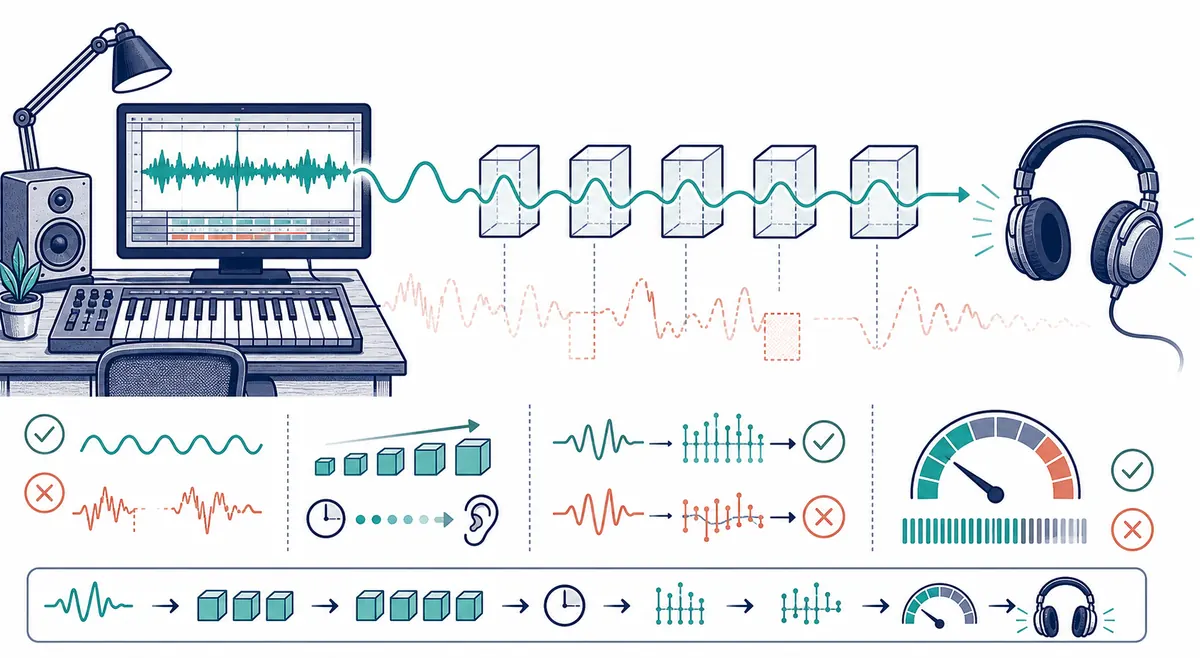
Crackles usually mean the current block cannot be completed in time. Raise the buffer one step, close browser audio and meeting applications, disable extra endpoints, and repeat the same project. If the crackle disappears, record the stable value and add devices one at a time. Do not lower the sample rate or compensation slider just to hide an underrun; those controls address different layers.
A silent meter is not a latency problem. Check that the host selected ASIO4ALL v2, the exact WDM child endpoint is powered on, the track or master output points to that endpoint, and Windows has not muted or disabled it. If the device is red or unavailable, another application may own it or the project rate may not match the endpoint. Reopen the host after changing ownership or format.
Drift or a doubled voice points to monitoring and clock paths rather than a single buffer number. Use one monitoring path, prefer a wired output during diagnosis, and avoid combining unrelated device clocks unless the session needs it. A native interface driver is usually a better first choice when it is current and exposes the required inputs and outputs directly.
| Symptom | Likely layer | Safe next test |
|---|---|---|
| Crackles after lowering the buffer | CPU, USB, endpoint, or buffer stability | Return to the last clean value and close competing audio applications |
| Meters move but headphones are silent | Host route or physical output | Check the master output and the exact enabled WDM endpoint |
| Endpoint shows unavailable | Ownership, Windows state, or sample rate | Close other hosts, check Windows Sound, and reopen ASIO4ALL |
| Voice is doubled | Direct plus software monitoring | Mute one monitoring path and keep one output destination |
| Latency changes between sessions | Different rate, device, plugin, or Bluetooth path | Record the full baseline and test with wired monitoring |
ASIO4ALL latency compensation checklist
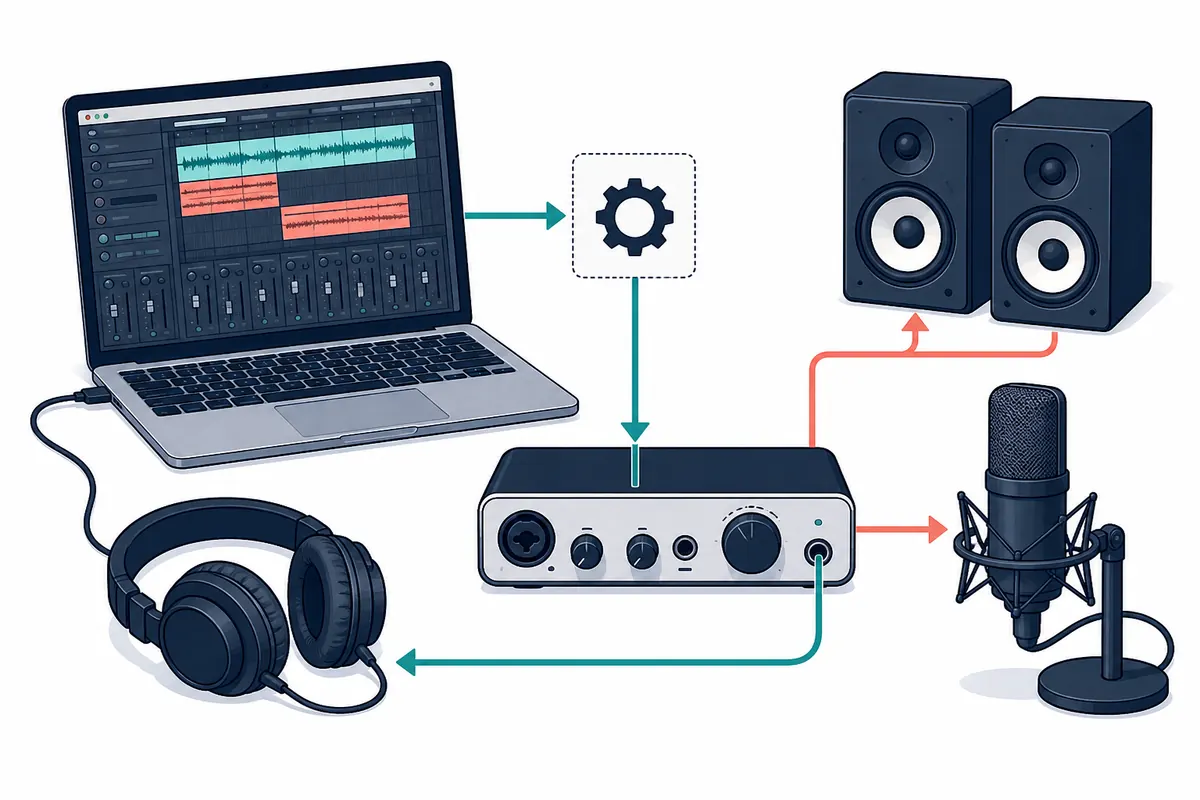
A good latency setup is a documented route: record the host, endpoint, rate, buffer, monitoring path, and physical output, then keep the last clean setting.
- The host selects ASIO4ALL v2 and the required WDM endpoint is enabled.
- One known input and one known output pass a simple test before extra devices are added.
- The sample rate is supported by both the host and the selected endpoint.
- The buffer was tested from a stable value downward and the last clean setting is recorded.
- Latency Compensation In/Out remain at default unless a loopback measurement supports a change.
- Crackles, silence, doubled monitoring, and drift are diagnosed as separate layers.
- A native ASIO driver is preferred when it is current and exposes the required hardware directly.
ASIO4ALL latency compensation FAQ
What does ASIO4ALL latency compensation do?
It reports additional input or output delay to the host so timing can be aligned. It does not make a device faster and it should not be changed by guesswork. Leave it at the default unless a repeatable loopback measurement tells you what value belongs to the selected endpoint.
Why does ASIO4ALL crackle at a low buffer?
The device or computer cannot complete the audio block in time, or another application is competing for the endpoint. Return to the last clean value, close other audio programs, disable extra devices, and test again before changing compensation settings.
Should I set Latency Compensation In and Out to zero?
Not as a default. Zero may be correct for a measured path, but the sliders report timing to the host and can make recorded alignment less accurate when changed blindly. Keep the default until you have a loopback result for that device and rate.
Why can a native ASIO driver be more stable?
A current manufacturer's driver owns its interface directly and usually exposes clearer channels and clock controls. ASIO4ALL remains useful for WDM-only or mixed-device routes.